POP3 EMAIL CONFIGURATION - OUTLOOK / WINDOWS
|
These directions should work for most recent Microsoft Outlook
versions, running on Microsoft Windows 98 and later. Scroll down for
screenshots.
|
| Step by Step Connection Help |
- Launch Outlook
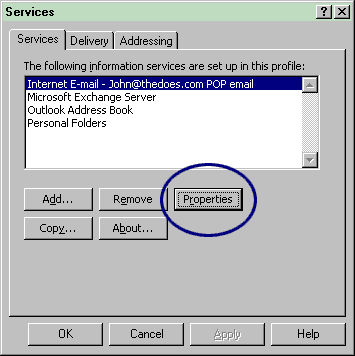
- Under "Tools" select "services..."
- Select "Internet Mail - (your account name)" and click
"Properties" to edit your account.
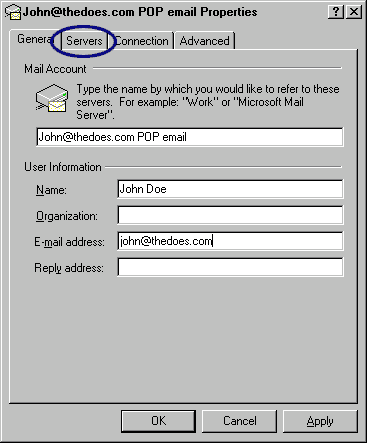
- On the "General" tab, enter these settings.
- You might want to re-type the name you would like to refer to
this account by.
- Name: The name you would like to display in
the "From" field
(i.e. John Doe or ACME Sales)
- Email address: Alias-you-chose@your-domain-name.com
(i.e. john@thedoes.com or sales@acme.com)
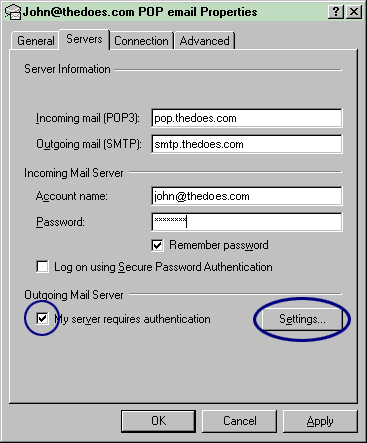
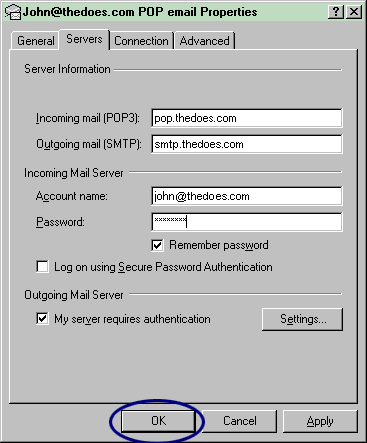
- Click the "Servers" tab and input these settings:
- Incoming mail (POP) server: pop.your-domain-name.com
(i.e. pop.thedoes.com or pop.acme.com)
- Outgoing mail (SMTP) server: smtp.your-domain-name.com
(i.e. smtp.thedoes.com or smtp.acme.com)
- Account Name: Your full email address:
alias-you-chose@your-domain-name.com
(i.e. john@thedoes.com or sales@acme.com)
- Password: password-you-chose (case
sensitive)
- Check the "My server requires authentication" box and
click the "settings" button.
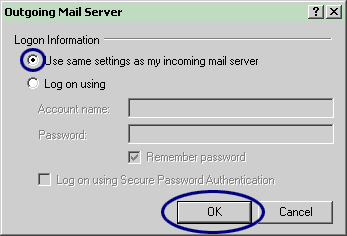
Make sure the "Use same settings as my incoming mail server"
radio button is selected.
Click "OK".
- Press "OK"
- Press "Close"
|
 |
| Screenshots |
 |